Stanley's Weaving Guide
Everything you need to turn your new loom and two balls of wool into real woven fabric. Read the first three parts, then start the mat.
Meet your loom
 1
2
3
4
4
5
5
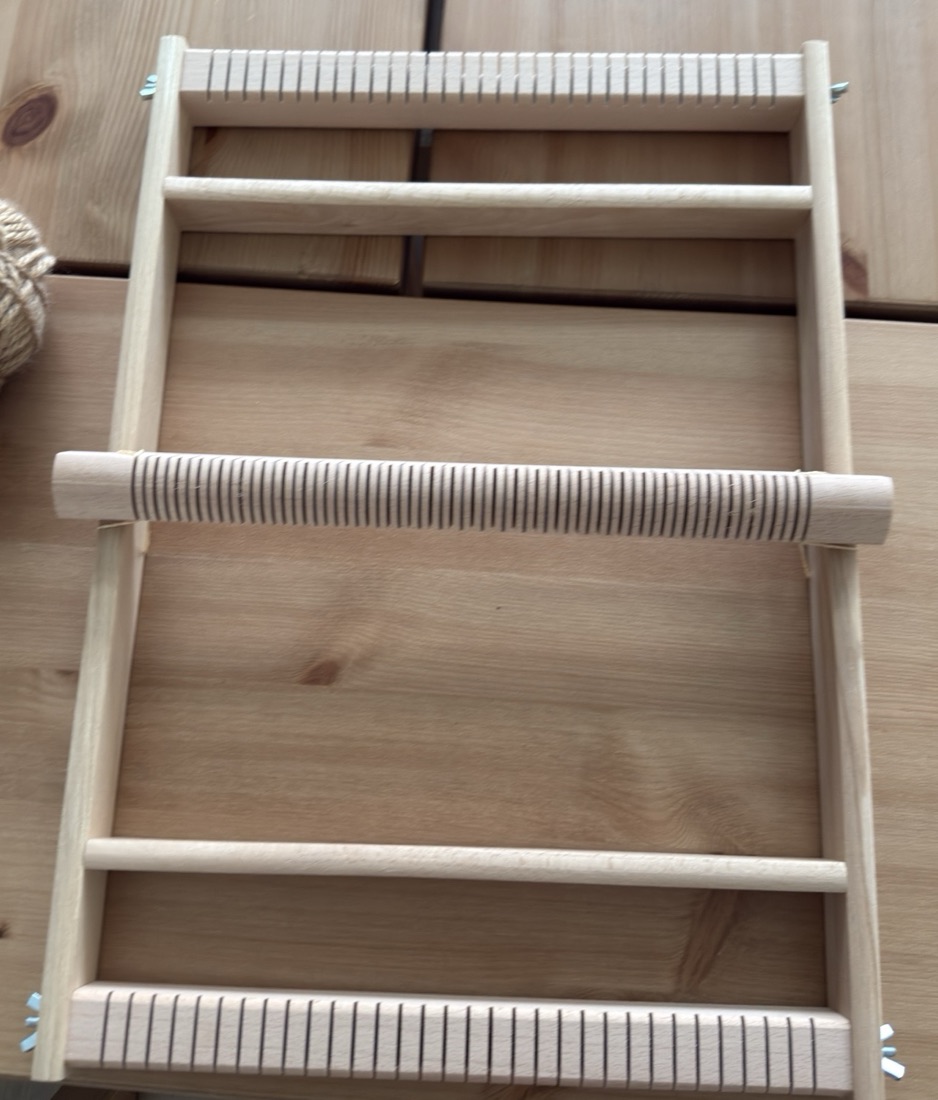
- 1Warp beamKettbaum
The top bar with the notches. The long threads start here. - 2Cloth beamWarenbaum
The bottom bar with the notches. You sit at this end, and your finished fabric ends up here. - 3RollerWendekamm
The grooved roller across the middle. Every thread gets its own groove. Turn the roller and the threads split into two layers. This is the magic part. - 4Wing nutsFlügelschrauben
Four of them, one at each corner. Tight: the beams can't turn. Loose: you can turn the beams to tighten the threads or roll up fabric. - 5Crossbars
Two plain bars that keep the frame stiff. Your weaving starts just above the bottom one.
Shuttle Schiffchen
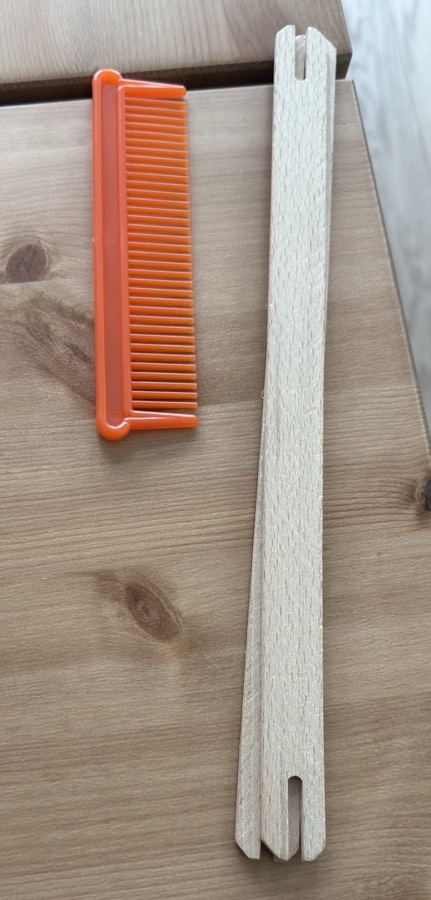
The flat wooden stick with a notch at each end. You wind your weaving yarn around it, then push it through the threads. It carries the yarn across.
Comb Kamm
The orange one. After every row you push the new yarn down against the last row with it. Gently, straight, all the way across.
Your wool
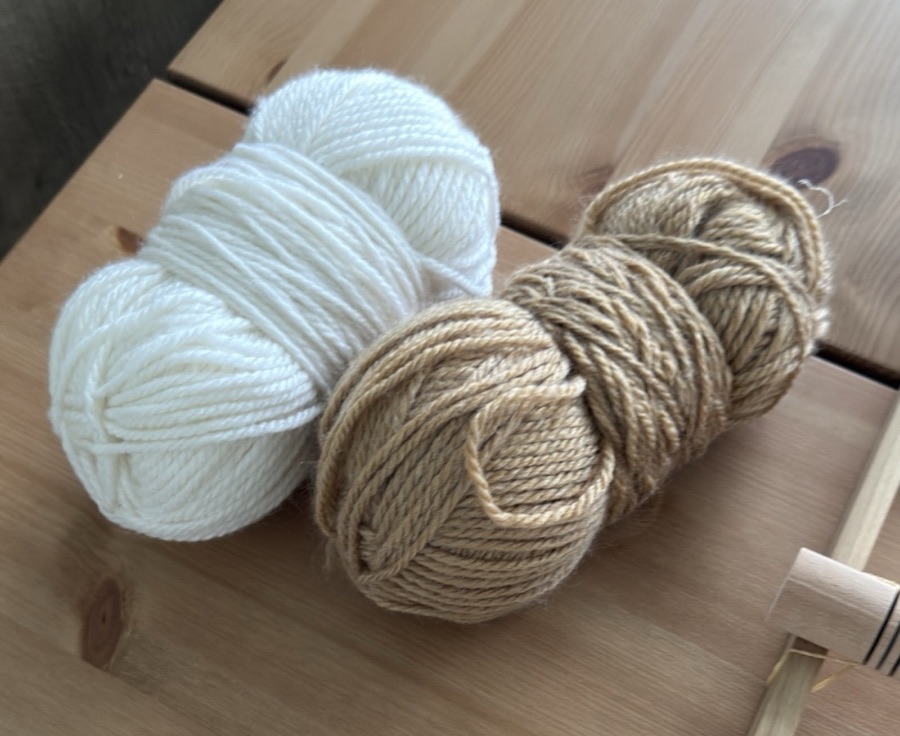
One ball of white, one ball of tan. Both are good for the long threads and for weaving across. Pull on a piece: it should feel strong and not snap easily.
Weaving words
The German words are in the little tags. They help when you watch the videos.
- Warp KettfädenThe long threads stretched from beam to beam. They are the skeleton of your fabric.
- Weft SchussfadenThe yarn you weave across, back and forth, with the shuttle.
- Tunnel FachThe gap that opens between the two layers of threads when you turn the roller. The shuttle goes through it. (Grown-up weavers call it the shed.)
- Row SchussOne trip of the shuttle through the tunnel.
- Comb down anschlagenPushing the new row snug against the last one with the comb.
Your first project: a striped mat
A small mat for your desk or under a mug, in white and tan stripes. It is small on purpose: you learn every move on it, and you can finish it in one afternoon. Then you make a bigger one.
- Size: about 12 cm wide and 12 cm long, plus fringe at both ends.
- Threads: use 12 notches on each beam. That gives you 24 long threads.
- Yarn: white for the long threads, tan and white for the stripes. Or the other way around. Your choice.
- Also handy: scissors, a tape measure, and someone to hold the ball of yarn when you put the threads on.
Long threads go from the top beam to the bottom beam, over the roller. Turn the roller and half of the threads lift up: a tunnel opens. Push the shuttle through the tunnel, comb the yarn down, turn the roller the other way, push the shuttle back. Over, under, over, under. That is all weaving is.
Put the threads on
Weavers call this warping bespannen. Go slowly here. Neat threads make easy weaving.
Set up. Put the loom on a table with the notched beams at the top and bottom and the long ends of the roller sticking out at the sides. Make sure all four wing nuts are tight. Keep the roller lying flat (not turned) and sitting on the side rails about halfway up.
Pick your notches. Choose 12 notches in the middle of the bottom beam and the same 12 on the top beam, straight across from each other. Count them twice.
Tie on. Tie the end of the white yarn around the bottom beam with a double knot, so the knot sits in your first notch. Do not cut the yarn off the ball. The whole warp is one long piece.
Up. Take the yarn straight up from that notch, lay it in the first groove of the roller, up into the first notch of the top beam, around the back of the beam, and back out of the same notch.
Down. Lay the yarn in the next groove of the roller and bring it down into the second notch of the bottom beam, around the back, and out of the same notch. Then into the next roller groove and up to the second top notch.
Keep going like a zigzag: up, around, down, around. Every thread gets the next groove on the roller, in order. No skipping a groove, no two threads in one groove.
Snug, not tight. Pull every thread like a guitar string, not like a bowstring. The important thing is that they are all the same. Pluck them: they should all sound about alike.
Tie off. At the last notch, tie the yarn around the beam with a double knot and cut it. You should now have two threads in every notch (one going up, one coming down) and one thread in each of the 24 roller grooves you used.
Check the tunnel. Hold the roller by its ends and turn it slowly toward you. Every other thread should lift. Look from the side: you should see a tunnel. Turn it back, then the other way: the other threads lift. If one thread does not move with its friends, it is in the wrong groove. Fix it now.
Wind the shuttle
Hold the end of the tan yarn against the shuttle with your thumb.
Wind the yarn the long way around the shuttle, end to end, catching it in the notch at each end. About 15 to 20 times around.
Keep it flat. A fat shuttle does not fit through the tunnel. When it runs out, just wind more.
Weave
Sit at the bottom end (the cloth beam). The roller should be about a hand's width above the place where you weave. It only rests on the side rails, so you can slide it a little if you need to.
Looking from the side. Each time you turn the roller, the upper threads go down and the lower threads come up. The yarn from the last row is now locked in.
The rhythm
Turn. Hold the roller by its two ends, keep it down on the rails, and turn it toward you until the threads split into two layers. Look from the side to see the tunnel.
Push. Slide the shuttle through the tunnel, flat, from one side to the other. Pull the yarn through until a tail of about 10 cm hangs out on the side where you started. (You will hide that tail in a minute.)
Hill. Do not pull the yarn straight. Leave it loose across the loom in a little hill, like a smile turned upside down. This is the most important trick in the whole guide.
Comb. Push the yarn down with the orange comb, gently, all the way across, so it lies flat against the crossbar (and later against your last row). The hill disappears into the row.
Turn back. Turn the roller the other way, away from you. Now the other threads lift and a new tunnel opens. Push the shuttle back through it. Hill. Comb.
Repeat. After a few rows you will feel the rhythm and stop thinking about it.
Seen from above. The hill gives the yarn enough length to go over and under every thread. Pull it straight and tight instead, and your mat slowly turns into an hourglass.
The edges
At each edge the yarn turns around the outside thread. Let it hug that thread, no yanking. Your mat will be a tiny bit narrower than the threads on the loom. That is normal. If it keeps getting narrower, your hills are too small.
Hiding the tails
After your first row, open the next tunnel and lay the hanging 10 cm tail into it for about 5 cm, then push the shuttle through as usual and comb. The tail is now inside the fabric. You do the same thing with every tail you ever have.
Changing color, or a new ball of yarn
Finish a row with the old color and let its end hang out at the edge, about 10 cm. Start the new color in the next tunnel from the same side, with its own tail hanging out. Weave two or three rows, then tuck both tails into a tunnel like above.
Stripes
Rows of tan, rows of white. Two and two, or three and three, or any mix you like. When you change colors often, you do not need to cut the yarn: carry the color you are not using up the edge, and twist the two yarns around each other at the edge every couple of rows so it stays tidy.
Take it off and finish
Stop weaving about 4 cm below the roller's lowest position, so you still have room to work. Leave thread for the fringe at the top, just like at the bottom.
Hide the last tail. Open one more tunnel, lay the end of the yarn into it for 5 cm, comb, and cut.
Loosen all four wing nuts. The threads relax a little.
Cut the loops. At the top beam, cut each loop once, at the back of the beam. One snip per notch. Do the same at the bottom beam. Your mat is free, with loose threads at both ends. That is your fringe.
Knot the fringe right away. Take two neighbor threads, tie them in a simple knot, and slide the knot snug against the edge of the mat. All the way across, at both ends. This locks the rows in place so nothing can slide out.
Trim. Cut the fringe to the same length everywhere. Done. Put your mat under a mug and admire it.
Long projects, like a scarf
With the quick setup above, your fabric can only be as long as the space on the loom. For a scarf, the threads have to be longer than the loom. The extra length gets rolled up on the top beam and unrolled as you weave. You need a helper for this one.
Take out the bottom beam. Loosen its two wing nuts and lift it out of the frame.
Measure. Your helper holds the bottom beam on the table, parallel to the loom, as far away as the scarf should be long. Add a bit: the sheet says planned length plus 10 percent, plus 10 to 15 cm for the fringe. A 100 cm scarf needs about 125 cm.
Zigzag. Put the threads on exactly like in Step 1, between the top beam (in the loom, over the roller grooves) and the beam your helper is holding. Your helper keeps it straight and keeps the threads snug.
Roll up. Loosen the top beam's wing nuts. Turn the top beam to wind the threads onto it, while your helper walks closer and keeps the threads straight and even. When the bottom beam reaches its place, set it into the frame and tighten all four wing nuts.
Weave, then roll. Weave like always. When the fabric gets close to the roller, loosen all four wing nuts, turn the bottom beam toward you so the fabric rolls onto it and fresh threads come off the top beam, pull the threads snug, and tighten the nuts again. Keep weaving.
Finish like Step 4: cut the loops at both beams, knot the fringe, trim.
A scarf that fills the whole width of the loom needs threads in every notch. Count them before you start, and wind both balls into the shuttle a few times, because it uses a lot of yarn.
Patterns to try
Change color every few rows. One and one, two and two, or random.
Put the threads on in color blocks: a few notches white, a few notches tan. Then weave with white only.
Put the threads on in blocks (say 6 notches white, 6 tan), then weave 6 cm of white, 6 cm of tan, and so on. Use the tape measure. Squares appear.
Two shuttles: white weaves only the left half, tan only the right half. Where they meet, twist the two yarns around each other once every row, or the halves fall apart.
Weave a few rows with thick yarn, then a few with thin yarn. The texture makes stripes even in one color.
Once the rhythm is easy, try shapes: a square in the middle with a different color (two shuttles again), or a diagonal by moving the color one thread over every row.
Fix-it list
- The mat is getting narrower→ You are pulling the yarn tight. Make bigger hills and stop yanking at the edges.
- Bumpy rows or little holes→ Comb slower and more evenly, all the way across, every row.
- One thread does not lift with the others→ It is in the wrong groove, or sharing a groove. Move it. If a row already went past it the wrong way, pull the shuttle back out and redo the row. Mistakes come out as easily as they went in.
- The threads feel loose→ Loosen the wing nuts a little, turn the top beam a tiny bit away from you, tighten the nuts. All the threads tighten at once.
- The roller rolls away or lifts off→ Hold it down on the rails with both hands while you turn it, and turn only until the tunnel is open.
- The shuttle does not fit through→ The tunnel is not fully open (turn a bit more) or the shuttle is too fat (unwind some yarn).
- A tail pokes out of the mat later→ It was tucked in too short. Next time lay tails in for a full 5 cm.
- A long thread broke→ Ask for help. Tie a new piece onto the broken thread with a knot up near the top beam, where it will not be woven, and put the new piece into the same groove.
Two videos
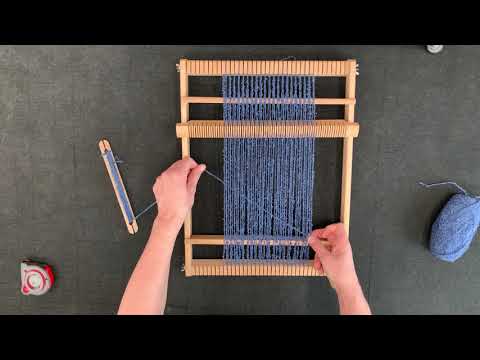
Both are in German. The looms in the videos look a little different from yours, but the moves are the same. Watch the first one before Step 1 and the second one before Step 3.